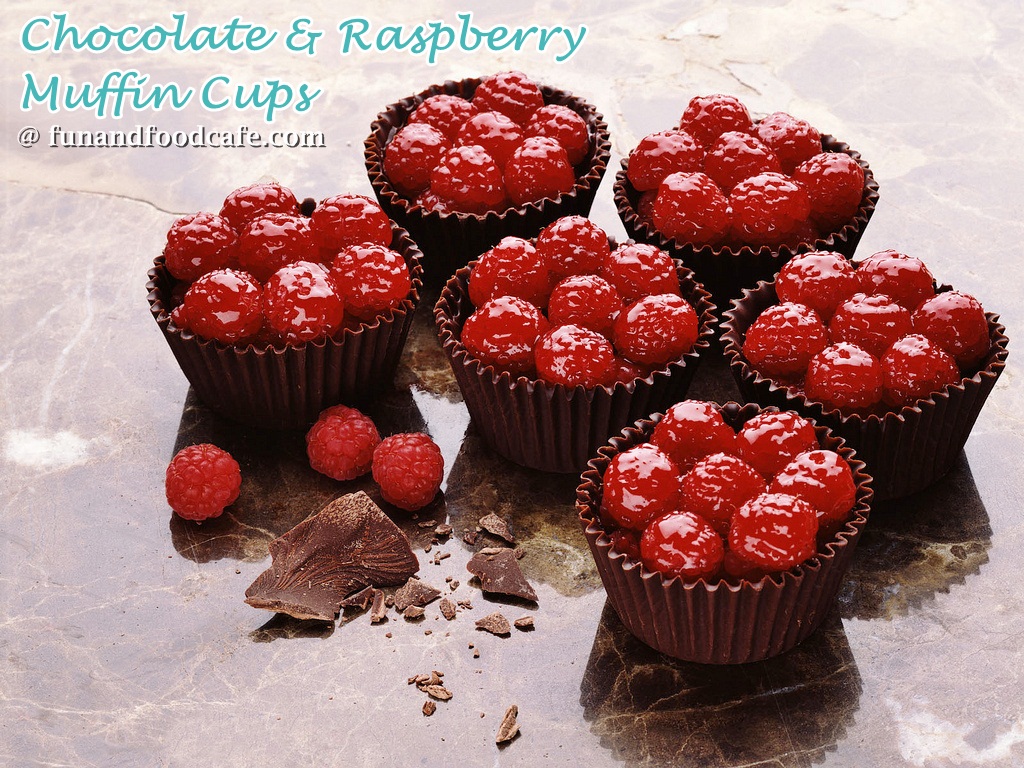
 Chocolate muffin cups filled with chocolate mousse and raspberries
I’ve been eying several Chocolate Cup recipes lately, some involving balloon cups, and some involving simpler things like muffin pans or silicone molds. As the latter seemed more easier to proceed with, I prefer it for a quick and clean approach if you decide to make these amazingly simple breath-taking dessert featuring chocolate muffin molds, filled with creamy chocolate ganache mousse, fresh raspberries and a drizzle of raspberry sauce! In fact, they would be great even for a kid’s birthday party, especially if you ask the kids to customize their own chocolate cups to fill them with the mousse and their favorite toppings!
If that description did not get you salivating, wait till you actually put one of these babies in your mouth – its like culinary bliss! And the best part, you can make the molds ahead of time, refrigerate them for several days if you like, and just fill them with any decadent edible thing that you fancy, to whip up an amazing bite-sized dessert in no time! The original recipe and photo above have been provided by King Arthur Flour, one of my favorite baking supply stores. however, I modified it a bit to fill the cups with the Ganache Mousse, adapted from Nigella Lawson’s cookbook How to be a Domestic Goddess, before topping it with the berries. You could fill it with any other mousse and fruit combination, or just make it healthy by pairing fruits with granola for a snack that the kids can indulge in on-the-go. I refer to several other recipe variations below that will help you make this your perfect chocolate cup recipe.
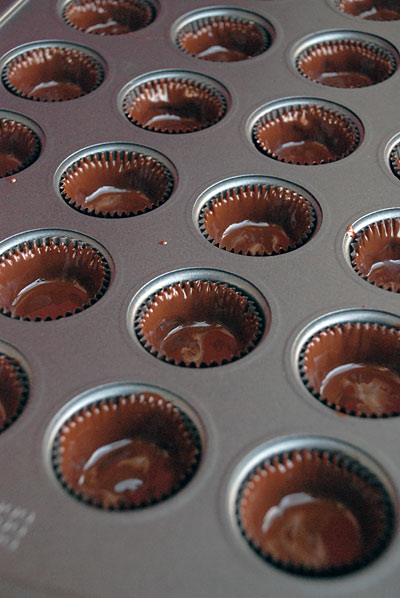 coating the silicon molds with melted chocolate to create the shells
They key to making perfect chocolate shells is to use a thick coating of chocolate on the molds. Too thin, and it will break or chip off, so the thicker it is, the more sturdy it will be. What I did was, I coated the shells once, then let them freeze for 15 minutes, then applied another coating of chocolate over it, making it a really thick chocolate shell. Just remember to keep the chocolate melted while the first batch is freezing, or melt it again before applying the second coat. And though paper liners work just fine, if you are doing this for the first time and want them to turn out perfect for an occasion, try using Silicon Moulds instead of muffin liners. They peel off easily without sticking, giving you perfect chocolate shells each time!
- For the chocolate cups
- 2 4-oz bars of semi-sweet chocolate
- mini-muffin liners
- ** you can use regular-sized muffin pans too
- For the mousse filling
- 5 oz marshamallows
- 4 tbsp butter
- 2 4-oz chocolate bars, roughly chopped
- 2 oz hot water
- 8 oz heavy cream
- 1 tsp coffee liqueur or vanilla extract
- For the raspberry sauce
- ½ cup sugar
- ¼ cup water
- 12 ounces raspberries + more for garnishing the cups
- To Make the Chocolate Cups: Melt the chocolate in the microwave in 20 second intervals, stirring in between to prevent it from scorching. Again, be sure not to overheat it. The cooler the chocolate is, the more easily it will adhere to the mold. Or use the double-boiler method to temper the chocolate, if you like.
- Place a small amount of the melted chocolate into the mold and spread to cover the bottom. Then take another small amount and use the back of a teaspoon or a paintbrush to spread along the sides of the mold. Be generous with the chocolate and coat a thick layer on all sides. You don’t want a thin layer; this will make the chocolate crack and break when you try to peel off the mold.
- Pop the muffin tray into the refrigerator for at least an hour, so the chocolate solidifies. In fact, keep it refrigerated until ready to fill and serve.
- To Make the Mousse Filling: In a heavy-bottom saucepan, melt the marshmallows, butter, chocolate and water together, stirring every now and then, until it melts and comes together, just like a semi-solid consistency that can be poured. Remove from flame and let it cool.
- Meanwhile, whip the heavy cream with vanilla or coffee extract until thick.
- Fold it into the cooling chocolate mixture until you have a smooth mixture, without any bubbles or lumps.
- Set in in the fridge for at least an hour, until ready to serve.
- To Make the Raspberry Sauce: Place sugar and ¼ cup water in a small saucepan over high heat; stir, and bring to a boil. Reduce heat, and simmer until sugar is dissolved. Remove from heat, and allow syrup to cool completely.
- Place raspberries and syrup in the jar of a blender; puree until smooth.
- Pour through a fine sieve or colander into a bowl; discard the seeds and solids. Serve or store in an airtight container, refrigerated, for up to 5 days.
- When ready to serve, remove the chocolate cups from the fridge. Cut off the silicone molds or paper liners at one end, and tear them off, peeling them off the chocolate shells. Fill them with a couple spoons of chocolate mousse, then top them with some fresh raspberries, and drizzle the raspberry sauce on the top, for a stunning dessert.
Its hard to go wrong with this recipe. The only skill needed is How To Temper Chocolate, and other than that, just make sure you apply a thick coating on the muffin liners to chieve sturdy cups that can hold fruits and fillings. What I like most about the recipe is that it can be made in parts a few days ahead of time, so you can easily assemble it on the D-day, without much stress, and yet win compliments for a stunning and decadent dessert!
Related Posts
- Easy Chocolate Raspberry Mousse
Chocolate Raspberry Mousse - one of the easiest and most indulgent of desserts, this is…
- Chocolate Mousse With Tofu
Healthy Chocolate Tofu MousseWhen I think of enjoying a dessert, on a whim, it needs…
- Chocolate Cheesecake Cups
Mocha Cheesecake in a CupIts great to be back from a vacation, and yet its…












thanks girls! appreciate your thoughts:)
They look fab!
Looks absolutely delicious! I reckon I could eat about 100 of them!