I am thrilled to pen down my first post in this new series that we are launching at FFC. ExpertTalk, as the name suggests, will bring to you some expert tips, tricks and techniques about the chosen topic, which in this case, is Pie Baking. Today we are joined by Deeba, the chef behind the glorious creations at Passionate About Baking, and Shaheen, the famous chef also known as The Purple Foodie. Deeba believes in baking from scratch, so its no wonder that you’ll find amazing baked treats on her blog, some sweet and some savory, exploring international flavors from her humble kitchen in India, whereas Shaheen has recently bagged a scholarship to a famous Pastry school in Paris, so she is having the time of her life playing around with food in the fascinating cities of Europe. I thank both of them deeply for taking time out of their busy schedules to share their expert thoughts with my readers. Together, the three of us will walk you through the process of creating your best pie ever!
We asked a bunch of questions to our Experts and got some really interesting and insightful answers. Instead of typing this up as a tutorial, I thought it would be best to break it into problems that people most often face while baking pies, and to provide solutions and resources to overcome them. Here you’ll find a complete guide to pie making; from creating the perfect crust, to constructing a lattice top, what to use and what not to use, along with links to some amazing pie recipes so you can practice what you have learned! Photos and recipes used in this featured tutorial are courtesy of Deeba, Shaheen and Flickr CC images.
What are the elements of a perfect pie?
For Deeba, the use of “good quality ingredients that are easy to find, minimal handling, tasty filling and a cold element” are essential for a winning pie recipe. Shaheen adds that “in addition to tasting fantastic, pies need to be flaky, tender, light, crisp and well browned.” So to sum it up, a great recipe, your choice of ingredients, be it fruits, cream, chocolate or anything else that you use to fill the pie, and a perfect home-made crust are the key elements of a perfect pie. And as you read on, you will know how to master all 3 of them!How to transfer the dough to pie dish?
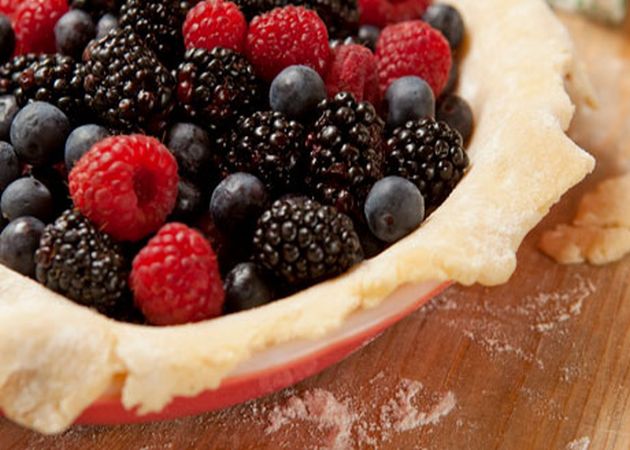
When it comes to making a perfect pie, getting the crust right is the key, and so this step, where you transfer the dough onto the pan, is very critical. If you don’t do it right, you end up with a torn or broken crust, and that’s pretty much the end of your pie! However, there are two easy ways to do this right.The rolling pin method: Starting at one end, gently roll the dough around the rolling pin, discarding the wax or parchment paper if using, then place the pan directly underneath. Center the dough over the pan, then gently unroll it into the pan. Carefully lift up the sides of the dough and use your fingertips to fit it gently against the bottom and sides of the pan, taking care that it doesn’t stretch or tear.
The quartering method: Start by folding the dough in half, then in half again. Set the point of the dough wedge in the center of the pan and gently unfold so it doesn’t tear or stretch. Next, carefully lift up the sides of the dough and use your fingertips to fit it gently against the bottom and sides of the pan, being careful not to stretch or tear it.
I personally prefer the Quarter method, as I think its the easiest to work with. While Shaheen opts for the rolling pin method most of the time, Deeba experiments with a Dorie Greenspan method, where she asks you to lift the dough in your hand and push it into place with your fingertips. So now you have 3 methods to choose from, just pick the one that’s most convenient for you and stick to it.
What is a Blind-Baked crust? Why do you need it?
Blind baking is a manner of pre-baking the crust without the filling added, i.e. just the pie shell. “This is usually done when the filling doesn’t need to be baked or when the filling needs to be baked for a shorter period of time than the pie crust. In addition to that, pre baking a pie crust helps seal the surface of the pie so that it’s not as permeable to liquids and doesn’t become soggy”, says Shaheen. So essentially, you pre-bake the crust alone, using pie-weights to prevent it from rising in the oven, and then fill it with your choice of ingredients, and bake for another 5-8 minutes, as outlined in the recipe.You can use pie-weights for blind-baking, if you like, but that’s just an additional cost. Whey spend money for something when you can use that bag of legumes lying around in your pantry?! “I don’t use pie weights”, says Deeba, “I cover the unbaked pie shell with foil, top it with dry legumes {chick peas or kidney beans) and just bake the shell!
What is a Double-Crust Pie?
For a double-crust pie, roll out a second round of dough at least an inch larger than the bottom crust. Use the transferring method of your choice to place it over the filling. Tuck the top edge over the bottom crust and pinch together to seal them, using water or egg-wash. Since a double-crust pie is sealed shut, you need to cut some slits in the top crust to allow steam to escape. Use a small, sharp knife to cut one-inch-long slits from the center to the outer edge of the pie, or use cookie-cutters to cut-out decorative shapes from the upper crust before placing it on the filling.How to you decorate your pies?
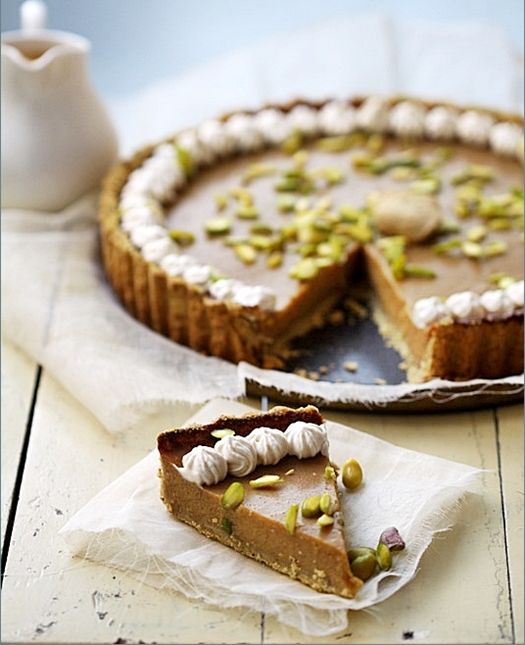
Visual appeal is as important as the taste, right? So what are some simple ways in which you can decorate your pies? “I love the lattice effect”, says Deeba, “but it can prove troublesome in the Indian summer when everything threatens to melt. So I like glazing my pie crust. Use either single cream, milk, or an egg wash. It gives the crust and lattice a great look”. Here’s a great Video Tutorial on How to Make a Lattice Pie. Shaheen loves using cutouts to top the pies. “I save all the trimmings from the crust and use cookie-cutters to make shapes that I then use to decorate my pies.” As for me, I go for the quick and easy, like frosting or whipped cream. Fill it up in a bag, work with your favorite star-tip and outline the pie for a stunning look ready in no time. I also try using fruits and nuts that pair well with the recipe, like pistachios, chocolate shavings, chopped fruit, citrus rinds, toasted walnuts or pecans, and decorate using these so they not only look beautiful, but add a bit of flavor and texture as well!What is the difference between a Pie and a Tart?
Like pies, tarts consist of a filling and a pastry shell. The main difference is in the dough, which is slightly sweeter and more tender than pie dough. Some tarts are baked with their filling while others are baked and then filled. The biggest difference between the two is that tarts are always open-faced—they never have a top or lattice crust. Tarts are usually baked in a straight-sided pan, often with a fluted edge, but they can be baked in different sized and shaped pans, including mini-tartlet pans.How do you know that the Pie is done?
If you are baking just the pie shell, it’s generally done when it is a light golden brown, about 15-20minutes. If the amount of the butter is quite high, then the shell will be quite fragile the minute it comes out of the oven. Let it cool completely before trying to dislodge it from the tart tin. As for fillings, test the center of the pie with a sharp edge tip of a knife. If it comes out clean, it’s done. Fruit fillings generally take about 45 minutes, and should be thick and jammy when they are done.Any tools you’d recommend to make pie-baking easy?
“A good rolling pin and a good quality loose bottomed pie tin” is all that Deeba needs to bake her fabulous pies. As for Shaheen, she says that “Working with hands gives you the feel of the dough and that in turn makes you a better baker”. I agree, but for novices in baking, there are a few tools that might come in handy. My personal favorites would be a good food processor, a pastry blender, pie-rolling rings, a good rolling pin, and definitely a cherry-pitter!How to store and serve Pies?
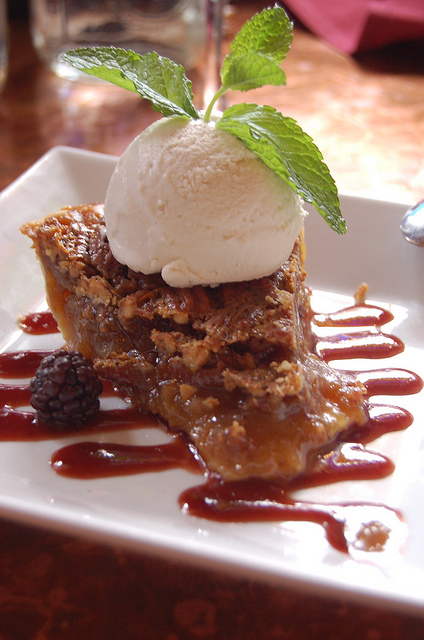
The best way to cool pies and tarts is on a cooling rack, at least for 15-20 minutes. This allows the air to circulate completely so that the ingredients have time to set. If you cut into it too soon, it’s likely to crumble or fall apart. Serve warm pies immediately after they have cooled down, probably with some cold whipped cream, ice cream or other topping to pair with the hot pie. For custard and cream pies, refrigerate them as called for in the recipe, and serve them cold.What are some easy pie-making tips for ardent bakers?
1. Read the recipe from beginning to end before you start. This helps you plan things and prep well.
2. Pie or tart shells are the best in cold weather. In summer, consider working during the cooler times of the day to prevent crusts from sagging or crumbling.
3. Always use extremely cold butter only to make your dough. This cannot be stressed enough!
4. Stop rubbing the butter into the flour when it looks like a mixture of bread crumbs and olives. The pieces of butter will create air pockets that will yield a wonderfully flaky dough.
5. For making dough, instead of ice water, fill the measuring cup with ice cubes and then add water until it reaches the rim of the cup.
6. If the dough doesn’t come together, add 1 tsp chilled water at a time. Give the rolled out dough resting time in the fridge else it will shrink while baking.
7. Roll the pie dough in cling film so it won’t need additional flour (buttery crust!) and if it breaks while rolling, it’s easy to fix.
8. For a quick-fix pie shell, use Digestive biscuits instead of the traditional graham-cracker crumbs.
9. Adding 1/2 a scraped vanilla bean to the pastry dough recipe which uses egg, helps curb the egg taste and smell, as well as adds a nice flavor.
10. Substitute a bit of AP-flour with almond meal; this gives a nice nutty taste to tart shells, as well as a huge flavor boost!
So, there you have it. And A-to-Z guide about baking pies at home, from scratch! With this easy-to-follow tutorial, we have tried to provide you a concise write-up that will answer most of your common questions related to pies. However, if you have any particular questions or concerns, our team of Experts would be happy to answer them, so please feel free to voice them via comments! Once again, I thank Deeba and Shaheen for their time, and for agreeing to do this inaugural episode of this special series. Be sure to check out their food blogs for more amazing tips and recipes.
Until next time, Happy Baking!
Get Inspired with these 10 amazingly delicious Pie Recipes:
No-Bake Oreo Pie @ Purple Foodie
Simple Apple Pie @ The Purple Foodie
Mixed Berry Pie with Lattice Top @ Passionate About Baking
Perfect Pumpkin Pie @ Passionate About Baking
Blueberry Vanilla Pie @ The Epicurean Mom
Banana Cream Pie @ Tartelette
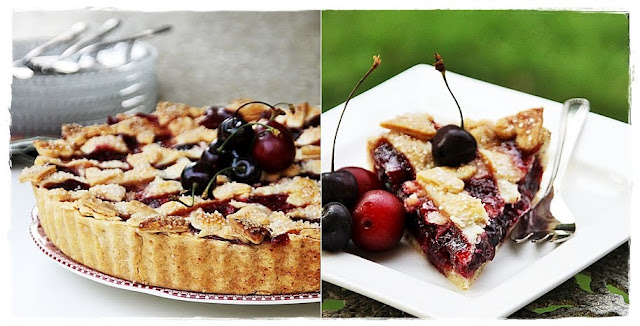
Open-Faced Chery Pie @ Fun and Food Cafe
Baked Sweet Potato Pie @ Fun and Food Cafe
Zesty Key Lime Pie @ The Pioneer Woman
Nutty Peanut Butter Pies @ The Recipe Girl
Related Posts
- Baked Sweet Potato Pie
Homemade Sweet Potato PieSweet Potatoes are a very versatile ingredient that is often kept on…
- How to Make Pie Crust?
For those who love baking pies, here's an easy recipe to make the perfect Pie…
- Open-Faced Cherry Pie
Open-Faced Cherry PieThe fresh fruit section in bubbling with bags and bags of cherries, strawberries,…
